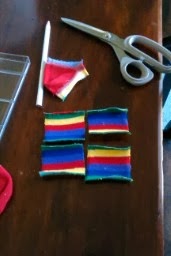
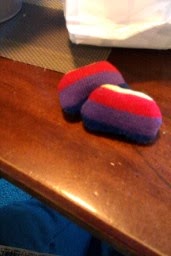
So, now we have two fortune cookies and a stuffed pair of arms and a loose nose waiting for assembly.
**Before you start attaching things, have a play with their placement. Most of the sites I visited talked of how hard it was to line up the arms. Mine turned out more to the rear than I originally imagined, but they were perfectly aligned because I played with their placement using pins beforehand (I’m sure the perfect was a one-off fluke, but I’m also sure that the pins help).
**Before you start attaching things, have a play with their placement. Most of the sites I visited talked of how hard it was to line up the arms. Mine turned out more to the rear than I originally imagined, but they were perfectly aligned because I played with their placement using pins beforehand (I’m sure the perfect was a one-off fluke, but I’m also sure that the pins help).


**What I did was put two pins where I thought the arms should go. The stripes helped with alignment, but if you don’t have stripes then you can still follow this method. Look at your monkey face-on and from above, and gradually adjust the pins so that you can align them. Then hold an arm in place and pin above and below it (four points of the compass) and either side. This will help you keep it in position as you attach it. At this point, don’t forget to remove the original central pin. J
Once you think you have the arms set, pin on the muzzle and ears to get an idea of overall appearance. I found that where I thought was perfect, I was attaching the arm to the jaw!! So I then moved the arms down again before attaching. Remove the ears and nose while you are attaching the arms if you wish – they can get in the way. At this stage, we are only attaching the limbs.
**Starting to attach in the armpit means that you can better hide any knots.
**Remember to keep the arm seam to the bottom.


So, you have a faceless monkey.
**Starting to attach in the armpit means that you can better hide any knots.
**Remember to keep the arm seam to the bottom.
So, you have a faceless monkey.
Now for the face.
There are various forms of the face, and if you search online you can find quite a lot. You can use buttons for the eyes, with or without the felt background. In my case, again because one is for a newborn, I used felt on felt. I didn’t want to risk a button being pulled off and swallowed. When you read my precautions below, you will understand that nothing short of a maniac with a knife will get my felt eyes off. J The other ‘safe’ option, is to sew an X for the eyes. That didn’t appeal to me, but it doesn’t mean that it’s wrong.

**Make the white section (top to bottom) longer than you would ordinarily think. The bottom edge will be underneath the muzzle. This saves awkward sewing when attaching the muzzle (trying to stitch between the muzzle and they eye piece) and also helps bind the fabric more firmly to the monkey.
**Try out everything just “sitting there” on the face and make any adjustments that you feel necessary.
You can either leave the arch as is, or make an indent in the middle like I am going to. Whether you cut the indent or not, follow the next step so that you can make sure your arch is as ‘bilateral’ as possible.


Fold the felt in half vertically, and trim the outer edges so that the two halves are identical. Then, if you are putting the indent between the eyes, cut off a wedge AT THE TOP OF THE FOLD.
Now you have another choice. I liked the idea of a coloured thread outlining the eye section to give it more definition, however, I knew that my limited sewing skills would make it an uneven effort if I did it while trying to attach the felt to the face. So, I cheated.
**Using doubled cotton, use running stitch to outline the arch of the felt. For a more pronounced look (this is what I did), run back over the same stitches in the opposite direction. I left gaps between my stitches to give it a more handmade look, but you can use back-stitch if you like to make a continuous line. Or, you can leave the line out altogether. (No photos of this stage, sorry, when I make the second one I’ll try to remember to take some photos and update this document).
**Using doubled cotton, use running stitch to outline the arch of the felt. For a more pronounced look (this is what I did), run back over the same stitches in the opposite direction. I left gaps between my stitches to give it a more handmade look, but you can use back-stitch if you like to make a continuous line. Or, you can leave the line out altogether. (No photos of this stage, sorry, when I make the second one I’ll try to remember to take some photos and update this document).
For my eyes I’m using black felt. I cut the pieces out I wanted (there are various shapes, have a look online and see what appeals to you; circle, rectangle, moon with a wedge cut out etc). I liked the rectangle. I also liked the idea of a little bit of white to add a glint to the eye.
**Before you sew anything, sit it loose on the face and see how it looks. I found I had to reduce the size of the black felt. It looked fine just on the white, but when you put it on the monkey it was far too big.


Again, rather than trying to sew it all on to a monkey face, I attached the black felt beforehand. Using black cotton I did running stitch all around the edge of the black. I preferred using this to using glue. I wanted a softer finish for young skin.
Then using white cotton I stitched a small X at the top end of the rectangle. If you want a glint, think about where it looks best on the eye style that you have chosen. If you are using buttons, sew them on with white cotton for a central glint.
Now, I found that by the time I had finished all the sewing with the black that it was starting to fray/pill. Here is my magic trick that you will find on no other site.
**Use a sticky surface (sticky tape or one of those sticky lint rollers for ironing with) to remove any tiny threads that have escaped. Once your surface is ‘clean’ use spray starch (or hairspray) to ‘fix’ the felt. You will probably have to renew this every time you wash the monkey, or whenever you notice any ‘untidiness’ (like if your newborn decides to suck on the face J ).

 When you are happy with your eyes, and you have finished all of your decorating, it’s time to sew it on. Rather than detract from the outline I had already done, I used white cotton and running stitch to sew ALL THE WAY AROUND the eye mount as I attached it. It meant that the felt was firmly attached, and that the coloured highlight drew the eye away from the attaching stitches.
You are now ready to sew on the muzzle.
**Use a sticky surface (sticky tape or one of those sticky lint rollers for ironing with) to remove any tiny threads that have escaped. Once your surface is ‘clean’ use spray starch (or hairspray) to ‘fix’ the felt. You will probably have to renew this every time you wash the monkey, or whenever you notice any ‘untidiness’ (like if your newborn decides to suck on the face J ).
You are now ready to sew on the muzzle.
The muzzle is the remaining piece of heel from the second sock. Fold it in half and trim off any excess pieces and try to make it as bilateral as possible (I forgot to do this but managed to hide the gaff by placing the ear on top of it J)
Pin the muzzle on at either end of the jaw, and then in the centre at the top edge. As you can see from the above photo, the stripe immediately above the muzzle is purple. I decided to let mine show as a thin sliver again to accentuate the eyes, but you might not like that.
Pin the muzzle on at either end of the jaw, and then in the centre at the top edge. As you can see from the above photo, the stripe immediately above the muzzle is purple. I decided to let mine show as a thin sliver again to accentuate the eyes, but you might not like that.
**Play with the position of the muzzle. Remember that you allowed extra length on the eye piece to allow it to go under the top edge.
When you are happy with the look, start at one of the corners (left or right end) and sew along the top edge from one side to the other. Leave the needle and thread hanging (or use part of the head as a temporary pin cushion).

**Pin the lower edge higher than you would think to allow the muzzle to stand more proud, otherwise you will have an overly long and flattened muzzle.
Resume sewing along the lower edge until you have about an inch to go. Then play with the stuffing and add as much as you think is necessary to achieve the shape that you wish. When you are happy with the amount of stuffing, finish closing the muzzle space.


Nearly done!
Next I put on the ears.
**Work out their placement first with pins. (See above right... if you look closely you can see the pin heads looking like tiny earrings).
I found that the easiest way to start their attachment (due to their awkward shape) was to use doubled over cotton. Pass the needle through the edge that you sewed together (the bottom of the fortune cookie, or for the plain shape the edge that you sealed) and then before you pull the thread all the way through, pass the needle through the loop. Now the thread is firmly anchored to the ear, you can begin attaching it to the head. Pinch together the head fabric and the ear fabric, just like you did for the arms and tail and tack it on. Given that ears are small and likely to be pulled and sucked on, I did a double round of stitching. Even if it comes off, it’s sealed shut so little mouths can’t feast on that choking stuffing.


Two more parts to go.
The mouth.
Now, again this is a personal taste area. Maybe you want a big cheesy grin. Maybe you want something more subtle. Maybe you don’t want to emphasise the lips at all. If you do wish to do something, I’d recommend using tailors chalk to mark out the line you will follow. (Given that I had a strong colour I just used a normal pencil to put on a light line).
**Mark out where you want the mouth to go, but try looking closely at the fabric first. You will find that there is a natural line there anyway from the way that the sock is woven. This should at least aide you as to how high/low to place your stitches.
**One site that I found said to use branch stitch for the mouth. I have no idea what that is. I just used running stitch across and then doubled back between the first lot of stitches to complete the line. You might want to leave it a broken line like the eye accent (if you used it), or you might use back-stitch. (My back-stitch looked atrocious, so I pulled it out and did running stitch again – I’m not much of a sewer).
**Play with different colours of cotton to see which one comes up best. We actually had a toss up between yellow, purple (more a fuschia shade) and dark blue. My son’s favourite colour is yellow, so yellow it was.


The final step is the nostrils. Now, you may not want to put them on, that’s fine. If you do, make sure you mark out where you want them to go first. You can even use a bobble-headed pin to mimic the shape. You decide whether you want a circle, or an embroidered circle, or an X and how big they are and how wide apart. You may want to pull the cotton tight to make an indent, or have them sitting lightly on the surface.
**One site that I found said to use branch stitch for the mouth. I have no idea what that is. I just used running stitch across and then doubled back between the first lot of stitches to complete the line. You might want to leave it a broken line like the eye accent (if you used it), or you might use back-stitch. (My back-stitch looked atrocious, so I pulled it out and did running stitch again – I’m not much of a sewer).
**Play with different colours of cotton to see which one comes up best. We actually had a toss up between yellow, purple (more a fuschia shade) and dark blue. My son’s favourite colour is yellow, so yellow it was.
The final step is the nostrils. Now, you may not want to put them on, that’s fine. If you do, make sure you mark out where you want them to go first. You can even use a bobble-headed pin to mimic the shape. You decide whether you want a circle, or an embroidered circle, or an X and how big they are and how wide apart. You may want to pull the cotton tight to make an indent, or have them sitting lightly on the surface.
As you can see, there are lots of variations on Sock Monkeys, and you will probably find that no two that you make will be identical. I hope that this guide has been helpful and easy to follow and that you get as much enjoyment out of making them as I did (tears and all, lol... well, I am heavily pregnant and hormonal). I also hope that your recipient loves your Monkey as much as my son loves “Mr Murphy”.
Angie
xoxo
Materials:
One pair of “fabulous” socks.
Sewing machine
One pair of “fabulous” socks.
Sewing machine
Thread in shades to match your monkey socks
Sewing needle
Two squares of felt – one black and one white (for my version of the eyes) OR two small buttons OR two safety eyes.
Sharp Scissors
Chop stick or knitting needle with a rounded non-pointy end
Toy stuffing
Ruler
Fabric pen (that washes out) or tailors chalk (my pen was dried up, so I ended up using a biro lightly, or a normal pencil)
Pins (quite a few).
Spray starch or hairspray
Sticky lint roller or sticky tape